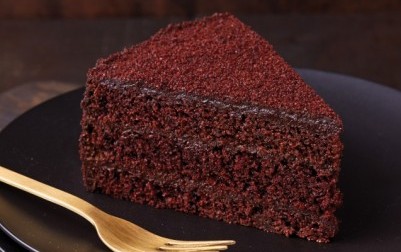
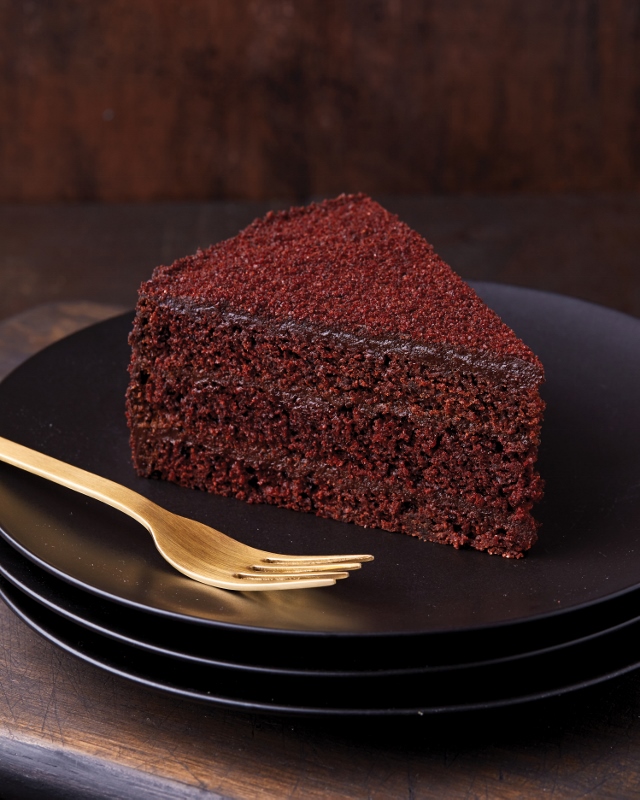
Fran Costigan’s Vegan Chocolate: Unapologetically Luscious and Decadent Dairy-Free Desserts is about to destroy any idiot comments about veganism you ever got. Just make the jerkmouth a few of these desserts, and watch them eat humble pie. Here’s Fran’s brilliant recipe for chocolate cake that will make the hairs stand up on the back of your neck.
Brooklyn Blackout Cake
My family moved from Brooklyn to Long Island when I was five years old, but I have vivid memories of my father regularly travelling back to Brooklyn to buy the famous Ebinger’s Bakery Blackout Cake we all missed eating. I still miss it today. It is etched into my memory as the most perfect chocolate cake in the entire world. And I am hardly alone in my adoration of this iconic cake, which is named after the World War II blackouts. The all-chocolate Blackout Cake was composed of three fudgy layers, each slathered with a rich and creamy chocolate pudding, frosted with the same pudding, then showered with chocolate cake crumbs made from a fourth layer. As wonderful as it sounds, it tasted even better. When I set about creating a vegan version, I knew it had to be a perfect rendition for the New Yorkers—especially Brooklynites—who grew up eating this beloved cake. I am proud to say I’ve served this cake to friends who were Ebinger fans and Brooklyn natives, and they all swear it is as good as the original.
This showstopper of a cake is easy to assemble, requiring only that creamy chocolate pudding be spread between the layers and on the sides and top. There’s no need to be fussy about smoothing the pudding, since it’s the thick covering of crumbs that creates the final “WOW!” The cake layers can be made ahead and frozen, and the pudding can be made a day ahead and refrigerated in a covered container.
Note: I think this cake tastes best with natural cocoa powder. If you cannot find natural cocoa powder where you live, you may use Dutch-process cocoa powder, just substitute 1 teaspoon baking powder and 1 teaspoon baking soda for the 2 teaspoons baking soda.
Makes one (9-inch / 23-cm) three-layer cake, 12 to 14 servings
- 2 cups / 414 grams organic granulated sugar
- 11⁄2 cups / 198 grams organic whole wheat pastry flour
- 11⁄2 cups / 193 grams organic all-purpose flour
- 2⁄3 cup / 50 grams natural cocoa powder (non-alkalized; see note about using Dutch-process cocoa powder)
- 2 teaspoons / 10 grams baking soda
- 1 teaspoon / 5 grams fine sea salt
- 2 cups / 480 ml water, at room temperature
- 2⁄3 cup / 160 ml mild tasting extra-virgin olive oil or organic neutral vegetable oil
- 3 tablespoons / 45 ml pure maple syrup, Grade B or dark amber
- 2 tablespoons / 30 ml apple cider vinegar
- 1 tablespoon / 15 ml pure vanilla extract
- 1 teaspoon / 5 ml chocolate extract (optional)
- 2 recipes Almost-Instant Chocolate Pudding (below), cooled
Almost-Instant Chocolate Pudding
I grew up eating my mom’s chocolate pudding from a boxed mix. It was a bit lumpy and thick, with rubbery chocolate pudding skin (I have permission from my dear mother to tell this story), but it was warm and chocolate and homemade, and I liked it. On the East Coast there was only one brand worth knowing: My-T-Fine, the premium pudding. It wasn’t exactly instant, since the mix had to be cooked with milk, and somewhere along the way Mom decided cooking pudding and washing the pot was not worth the effort. We moved over to Jell-O brand—really instant pudding: put the mix in a bowl, add milk, and mix with a rotary egg beater. Still, if the bowl wasn’t deep enough (especially if I was doing the mixing) it spattered, and then there were still beaters to wash. And the finished pudding was cold! That’s why I love this recipe so much: in the same time it took my mom to make sad chocolate pudding, you can make Almost-Instant Chocolate Pudding that is real chocolate pudding the way we always wanted it to be: warm, thick, and chocolaty.
Note: The cornstarch is crucial to get the right texture for this pudding. Using another starch thickener, such as my usual first choice arrowroot, would result in pudding with a soft and unpleasant texture.
- Makes 21⁄4 cups / 540 ml for 3 to 4 servings
- 1⁄2 cup / 111 grams organic granulated sugar
- 1⁄4 cup / 28 grams organic cornstarch (do not use arrowroot, see Note)
- 1⁄4 cup / 25 grams Dutch-process cocoa powder
- 1⁄4 teaspoon fine sea salt
- 11⁄2 cups plus 6 tablespoons / 450 ml vanilla soymilk, vanilla almond milk, or vanilla coconut milk beverage
- 11⁄2 ounces / 43 grams dark chocolate (59 to 62%), chopped into small pieces
- 1 teaspoon / 5 ml pure vanilla extract
1. Sift the sugar, cornstarch, cocoa powder, and salt through a wire mesh strainer into a medium saucepan. Slowly stir in the milk. Keep stirring until no trace of any of the dry ingredients is visible. The idea is to make sure the cornstarch is completely dissolved before you turn on the heat.
2. Cook over medium-high heat, whisking frequently, until the mixture begins to thicken and is close to a boil. This can take as long as 12 minutes. Adjust the heat as needed to get a full boil, but don’t let it be so high that the bottom scorches. As soon as the pudding starts to boil, it will thicken to pudding consistency. Immediately lower the heat and boil gently for another minute, stirring frequently with a silicone spatula.
3. Remove the saucepan from the heat. Gently stir in the chocolate with the silicone spatula until the chocolate is melted and incorporated.
Stir in the vanilla.
4. Spoon the pudding into a bowl. It will be set and ready to use in about 30 minutes at room temperature, but it can be refrigerated for up to 24 hours. If you refrigerate it, cover the surface with plastic wrap, making sure the wrap adheres to the pudding to prevent a skin from forming.
1. Position a rack in the middle of the oven and preheat to 350˚F / 180˚C. Oil the sides and bottoms of two 9 x 3-inch / 23 x 7.6-cm round cake pans. Line the bottoms with parchment circles. Do not oil the paper.
2. Place a wire mesh strainer over a large bowl. Add the sugar, whole wheat pastry flour, all-purpose flour, cocoa, baking soda, and salt to the strainer and stir with a wire whisk to sift the ingredients into the bowl. (If any small bits remain in the strainer, add them to the mixture in the bowl.) Whisk to aerate the mixture.
3. Whisk the water, oil, maple syrup, vinegar, vanilla, and chocolate extract (if using) in a separate medium bowl until completely combined. Immediately pour into the dry mixture and whisk until the batter is smooth.
4. Divide the batter between the 2 pans. Rotate the pans to level the batter and tap them lightly on the counter to eliminate air bubbles.
5. Bake on the middle rack for 30 to 35 minutes, or until the tops of the cakes are set, the sides have started to pull away from the pan, and a wooden toothpick or skewer inserted into the center comes out clean or with just a few moist crumbs.
6. Set the cakes on wire racks. After 5 minutes, run a thin knife around the sides of each cake to release the sides of the cake from the pan. Invert each cake onto a rack. Remove the pans and carefully peel off the parchment paper. It is fine to cool the cakes bottom side up.
7. When the cakes are completely cool, slide a 9-inch cardboard cake circle under each one. Wrap the layers with plastic wrap and refrigerate for about 1 hour, or until cold.
Assemble the Cake
1. Use a long serrated knife to slice each cake layer in half horizontally to form four layers. Crumble one of the layers into a food processor. Pulse the processor a few times to make medium-size crumbs, but stop before they get too fine. Pour the crumbs into a bowl.
2. Line a rimmed baking sheet with parchment paper. Place one of the remaining three layers, still on the cake circle, on the baking sheet. Spread with a scant cup of the pudding. Place a second cake layer on the pudding, board side up. Remove the board and spread the layer with another scant cup of pudding. Slip the board under the last layer and invert it onto the cake. Spread with another scant cup of the pudding. Refrigerate the cake and remaining pudding for 20 minutes. (It is easier to finish a cold cake.)
3. Cover the sides of the cake with the remaining pudding. Sprinkle the top and sides of the cake liberally with the cake crumbs, completely covering the pudding. Pat the crumbs lightly to make sure they adhere. Use all the crumbs, even the ones that fall onto the paper.
Keeping
It’s best to serve this cake within 24 hours, but it will hold up for a day in the refrigerator. It is not necessary to wrap the cake.
In Vegan Chocolate, you will find better-for-you interpretations of 120 favorite chocolate desserts: flavored chocolate truffles, Brooklyn Blackout Layer Cake, Éclairs, White and Dark Chocolate Cheesecake, Black-Bottom Cupcakes, Chocolate Pecan Pie, Mocha Crème Brûlée, Brownie Crumble Ice Cream, and even Moon Pies made with homemade vegan grahams. All of the recipes are plant-based, some are gluten-free and some are raw, but every single one is absolutely chocolate and made with quality, easily sourced ingredients, without dairy, eggs, and white sugar. From setup and cooking to storing and keeping, Fran’s detailed instructions make for perfect results every time. She’s an internationally recognized culinary instructor, recipe developer, and innovative vegan pastry chef, and the author of three cookbooks. A graduate of the New York Restaurant School and the Natural Gourmet Institute, Fran was a pastry chef in both traditional and vegan restaurant kitchens. Today Fran teaches her distinctive courses (including her Vegan Baking Boot Camp Intensive®) in her hometown of New York City at the Institute of Culinary Education and at the Natural Gourmet Institute and at major events throughout North America and Europe. Please visit her at francostigan.com.


